Friday, January 18

Bread Pokada.. Bread Fritters.

Bread Pokada. First time i ate this bread pokada in faizabad after my marriage. It was good but some how i din't like it that much, i felt it was too oily. Most of the time when we go to my in-laws place, my elder brother in-law brings this bread pokada from his favorite shop for breakfast, because my hubby like's to eat this oily stuffs sometime. He was telling me from a long time to cook break pokada, i also use to tell him ask me anything to cook i will cook for you immediately except bread pokada. On last saturday he had gone for a hair cut and i felt this is the right time i should cook few bread pokada before he come's home, but before i prepare to cook he was home :) After seeing me cooking he was happy. I served with some mint chutney, tomato sauce and hot ginger tea.


Ingredient's
4-5 Bread Slices
1cup Gram Flour (Besan)
1/4th tsp turmeric powder
1/4th red chili powder to taste
1/4th tsp Garam Masala powder
1/4th coriander powder
1/2 tsp Ajwain
Salt to taste
Oil for frying
Water to make a batter


Cooking Method.
Heat oil in a kadhai. Cut Bread slices into desired shapes (like triangle, rectangle etc.)
In a bowl add gram flour, salt, chili powder, garam masala, coriander powder, turmeric, ajwain and mix it.


Now by pouring little water at a time to make a smooth batter (neither too thick nor too lose)
Dip bread piece in the batter and fry till crisp on medium flame.
Serve bread pakora hot with Green Chutney and Tea.


Saturday, January 12

Chicken Dum Briyani..

Chicken Dum Briyani. I had cooked this Briyani on my 3rd year marriage anniversary. From that time i had kept this in draft but never got the right time to post it. I think now i can't make this post to wait for any more, because for me tomorrow never comes. I used to think cooking Dum briyani is difficult then the normal briyani which is cooked by mixing every things together, but it is not right. They both take same effort and same time.. Now I prefer dum briyani because it taste better then the normal briyani... I have not used deep fried onion in this recipe, i have saved it for one more recipe of dum briyani. Do try and let me know.


Ingredients.
1/2 kg Basmati rice 
Chicken 1/2 kg
Few strands for saffron 
2 big size onion, 4 tomato (finely chopped)
3 green chilly (chopped) 
4 to 5tbsp of chopped coriander and mint leafs
2tbsp Ginger, garlic paste
2tbsp red chilly powder, 1tbsp turmeric powder 
1tbsp coriander powder, 1tbsp garam masala 
1cup curd, 2tbsp lemon juice
Salt as per taste.


For Tempering.
2 bay leafs, 1 cinnamon stick, 2 green cardamom
2 cloves, 1 big black cardamom, 2 star anise
1tbsp shah jeera 
Oil as per your requirment.


Cooking method.
Wash and soak the rice in enough water for 20 to 30 minutes. In the same time soak the saffron also in warm water. 
Heat the deep frying pan add oil, when oil is hot, add all the tempering ingredients and leave till it become's brown. 
Then add onion, ginger garlic paste fry for till the onion becomes lite golden brown, then add chicken, turmeric, and salt, fry it till the chicken starts leaving oil. 
After that add red chilli powder, coriander powder and garam masala, give a quick stir, then add tomato, curd, lemon, green chilly, and cook till the tomatos becomes soft, then add 2tbsp of mint and coriander leafs and mix it well.
Half boil the rice in a seprate pan. add water in to rice as per it required's. Then in a separate big pan add one layer of chicken and one layer of half boiled rice. Then sprinkle from top saffron water and left over mint and coriander leafs. (you can make as many as layers you like, but i have made one 2 layers). Cover the lid and cook till the rice is completely cooked in a medium flame.
Serve hot hot with (Raita)


Thursday, January 10

Moong Dal And Vegetable Pulao.. (Pressure Cooker Version)

Vegetable Pulao. Usually people make pulao in so many different ways and there are many recipes and versions to it. Even i cook many version by adding different kinds ingredients, you can make recipe taste different by changing or adding any ingredients. In south India pulao's are very famous in every household because it is easy to make and very very tasty to eat any time of the day. As i have mentioned in my previous post that i don't like to eat much of rice items, i cook all types of rice items just because my hubby finds it very tasty and he feels cooking rice is easy then cooking roti's and sabji, but i feel both are the same.. When it come's to vegetable pulao i cook very often not because it taste good because it looks and smells good..


Ingredient's
1cup vegetable (potato, carrot, beans, mutter, cauliflower)
2cup rice (Basmati or normal rice)
2tbsp moong dal
1 medium onion and 2 green chilli (finely slice)
1 medium tomato (finely chopped)
1tsp turmeric, 1tsp coriander powder, 1tsp garam masala
Salt to taste
Coriander leaves for garnishing.


For tempering
1 bay leaves, 2 dry red chili
2 star anise, 1 cinnamon stick
2 cloves, 2 green and black cardamom
1tsp cumin seeds
3tbsp oil.


Cooking Method
If you are using basmati rice then soak the rice in water for atleast 30minutes, no need to soak the rice if you are using normal rice, just wash and keep it aside.
In a pressure cooker, add oil, when the oil is hot add cumin seeds and all the tempering spices, when they turn brown, add moong dal, when dal turns lite golden brown, add onion and green chillies, fry to golden brown.


Then add turmeric, coriander powder and garam masala, fry for 1 to 2minutes, then add all the vegetables and tomato, fry for another 1 to 2minutes. Now add the rice, salt and enough water, cover the lid and cook for 3 whistle (1 in high flame, 2 in low flame), then allow the pressure to go and open the lid and mix well.
Serve hot with Onion Raita.


Wednesday, January 9

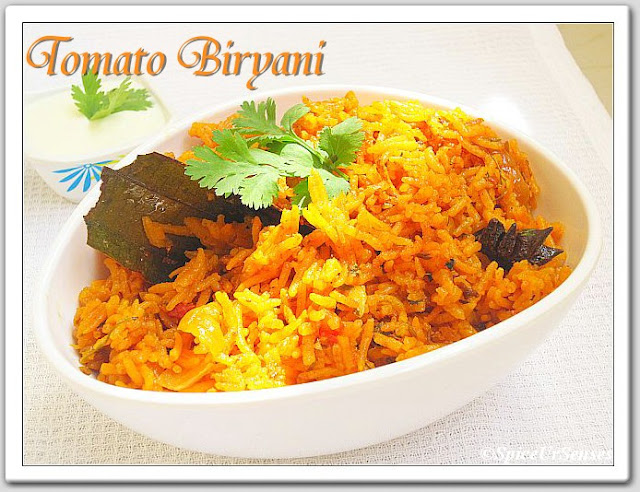
Tomato Briyani..(Pressure Cooker Version)

Tomato Briyani is very similar to Tomato rice with a little twist of ingredients. Tomato rice taste more a like tangy taste, but i have kept very less sour taste in briyani. Last week during his holidays i had cooked this one pot meal for the lunch and i serve with chilled yogurt raita. When ever you ask him shall i cook tomato rice he will never say no to it, he loves tomato rice but i'm not a big fan of rice items, i cook rice items just because he likes it and i enjoy seeing him eating.. This is my new innovation in briyani and my hubby like it very much. I hope my blog readers also like this recipe :)


Ingredient's
2cup Raw rice
1 Bay leaf, 1 Cinnamon stick, 2 Cardamoms
2 dry red chillie, 2 star anise 
2 Onions, 2 green chillies (finely sliced)
2 ginger garlic paste 
1 hand full of mint leaves 
1tsp Kasoori methi 
1tsp red chili powder, 1tsp turmeric, 1tsp coriander powder 
1tsp Cumin, 1/2tsp mustard seeds 
1/2cup curd
a pinch of food color 
Tomato 2 (large red tomatoes, finely chopped) 
Oil 2 tbsp 
Salt to taste 
Coriander leaves for garnish.


Cooking Method
Heat oil in a pressure cooker, add cumin, mustard, cinnamon, cardamoms, star anise, red chillies and bay leaf, stir fry 30 secs. Add the sliced onions and saute for 3minutes. Add green chili, ginger-garlic paste, mint leaves and kasoori methi and saute for 4-5minutes. Add red chili powder, turmeric and coriander powder and mix. Add chopped tomatos, curd and salt to taste, mix and cook till oil separates. Reduce heat, add the raw rice, food color, mix gentely, then add 3cup of water, close the lid and pressure cook for 3whistles (1 in high flame 2 in low flame)


Remove onto a serving bowl. Garnish with fresh coriander leaves. Serve warm with raita or any curry of your choice.


Thursday, December 27

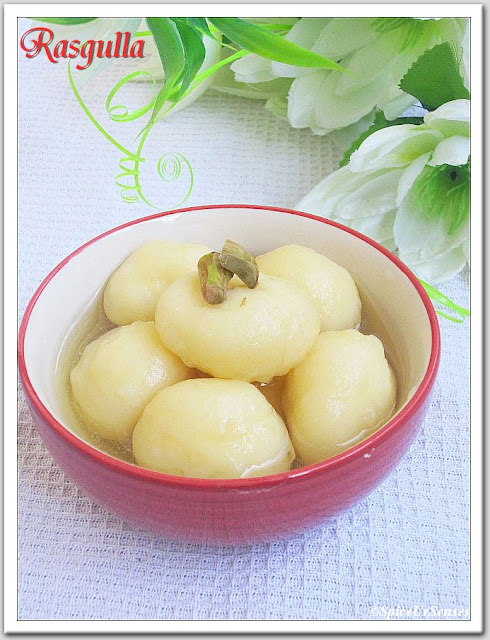
Bengali Rasgulla..

Rasgulla it is popular throughout India and other parts of South Asia. The dish is made from ball shaped dumplings of chhena (an Indian cottage cheese), cooked in light sugar syrup. This is done until the syrup permeates the dumplings. This was the first attempt and i was quite happy with the result.


Ingredients:
4 cups milk
1/4 cup lemon juice
1 1/2 cups sugar
4 1/2 cups water
1tsp arrowroot flour
Pressure cooker.


Method for Paneer/Chhena
Mix lemon juice in half cup of hot water and keep aside.
Boil the milk in a heavy bottomed pan over medium heat, stirring occasionally, making sure not to burn milk.
As the milk comes to a boil, add the lemon juice gradually and stir the milk gently. The curd will start separating from the whey, turn off the heat.
Once the milk fat has separated from the whey, drain the whey using a strainer line with muslin cloth.
Wrap the curd in a muslin cloth, and rince under cold water, and squeeze well. This process takes out the sourness from the lemon.
To check if enough water is out of the paneer, take a little piece of paneer on your palm and rub with your fingers. After rubbing the paneer for about 15-20 seconds, you should be able to make a firm but smooth ball.
Once the paneer is drained, place on a dry, clean surface and knead the paneer for 3-4 minutes until the paneer is almost rolls into smooth soft dough.
Knead the paneer and arrowroot flour by dragging the palm of your hand hard on the paneer. Keep scooping it back to togather and knead more. If the paneer is too crumbly, add a teaspoon of water. Your palm will be little greasy.


Method For Rasgulla 
Divide the dough into 12 equal parts and roll them into smooth balls.
To make the balls apply some pressure at the first and then release when forming the balls.
Mix the sugar and water in a pressure cooker on medium high heat and bring to a boil.
Add the paneer balls and close the pressure cooker. After the pressure cooker starts steaming, turn the heat to medium and cook for about seven minutes.
Make sure the pressure cooker is large enough to accommodate the finished Rasgullas, as they will expand to about double in the volume while cooking in the syrup.
Close the heat and wait a few minutes before you opening the pressure cooker. Pour cold water over the pressure cooker before opening.
Rasgullas should be little spongy. Serve the Rasgullas chilled.


Related Posts with Thumbnails